

Up until now my workflow for new images brought into Lightroom has been to do a few passes of culling, which involves marking some images with either a star for early favorites, a reject tag (X) for definite deletes, and no markings for decent but not outstanding images. I add color labels to images that are to become part of a panorama, exposure or focus blending series of images, teaching images, etc. And I add bulk and then specific metadata. Subsequent passes may increase star ratings and usually add a few more images to the delete pile.
I’ll delete all the images marked with an X and then make sure all remaining images have keywords, captions, and location information.
I usually will do some image editing at this point, mostly in Lightroom but some will go to DeNoise AI and saved as tiff files. Some will go to Photoshop for anything that can’t be done in Lightroom. But I usually don’t do a lot of image editing at this point. Mostly I just want to get the images imported, culled, and add metadata and ratings.
The last thing I do before I send the images off to their archiving home is to convert them to DNG (deleting the original raw files). The reasons I do this are that DNGs don’t need xmp sidecar files and they have a smaller file size than the raw files from the camera, in my case, Nikon NEF files.
That workflow just got a kick in the pants with the latest version of Topaz DeNoise AI (3.3).
Topaz has added a new noise reduction model to DeNoise AI called RAW. As the name implies, it works on RAW files that can then be saved as tiff, psd, jpg, png, or dng.
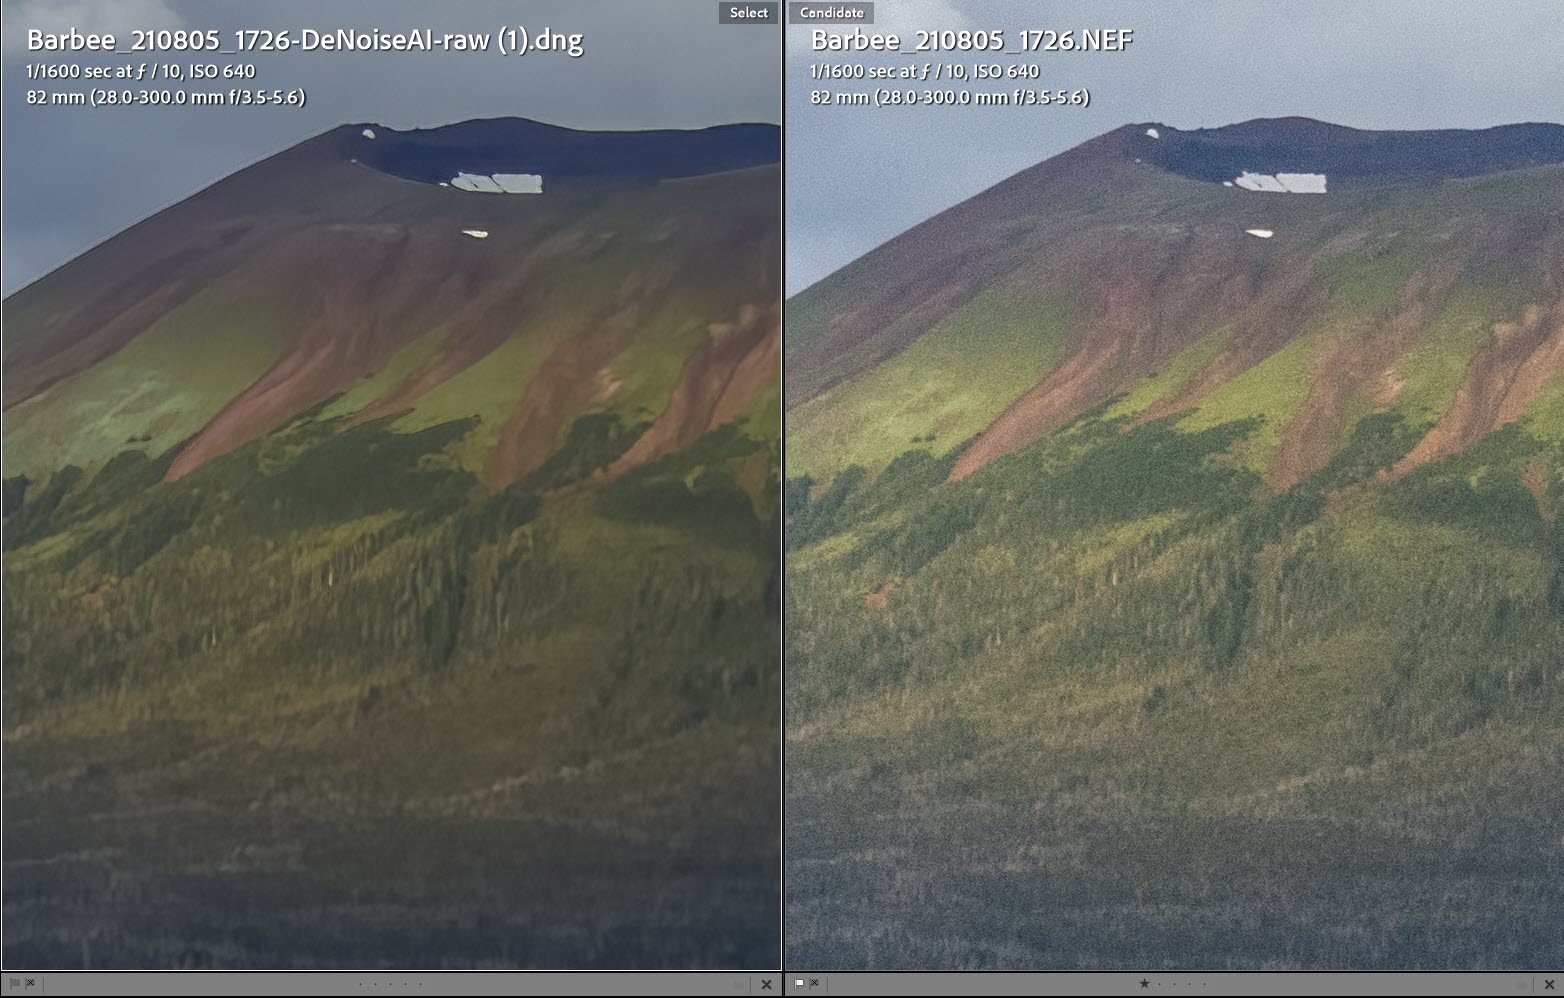
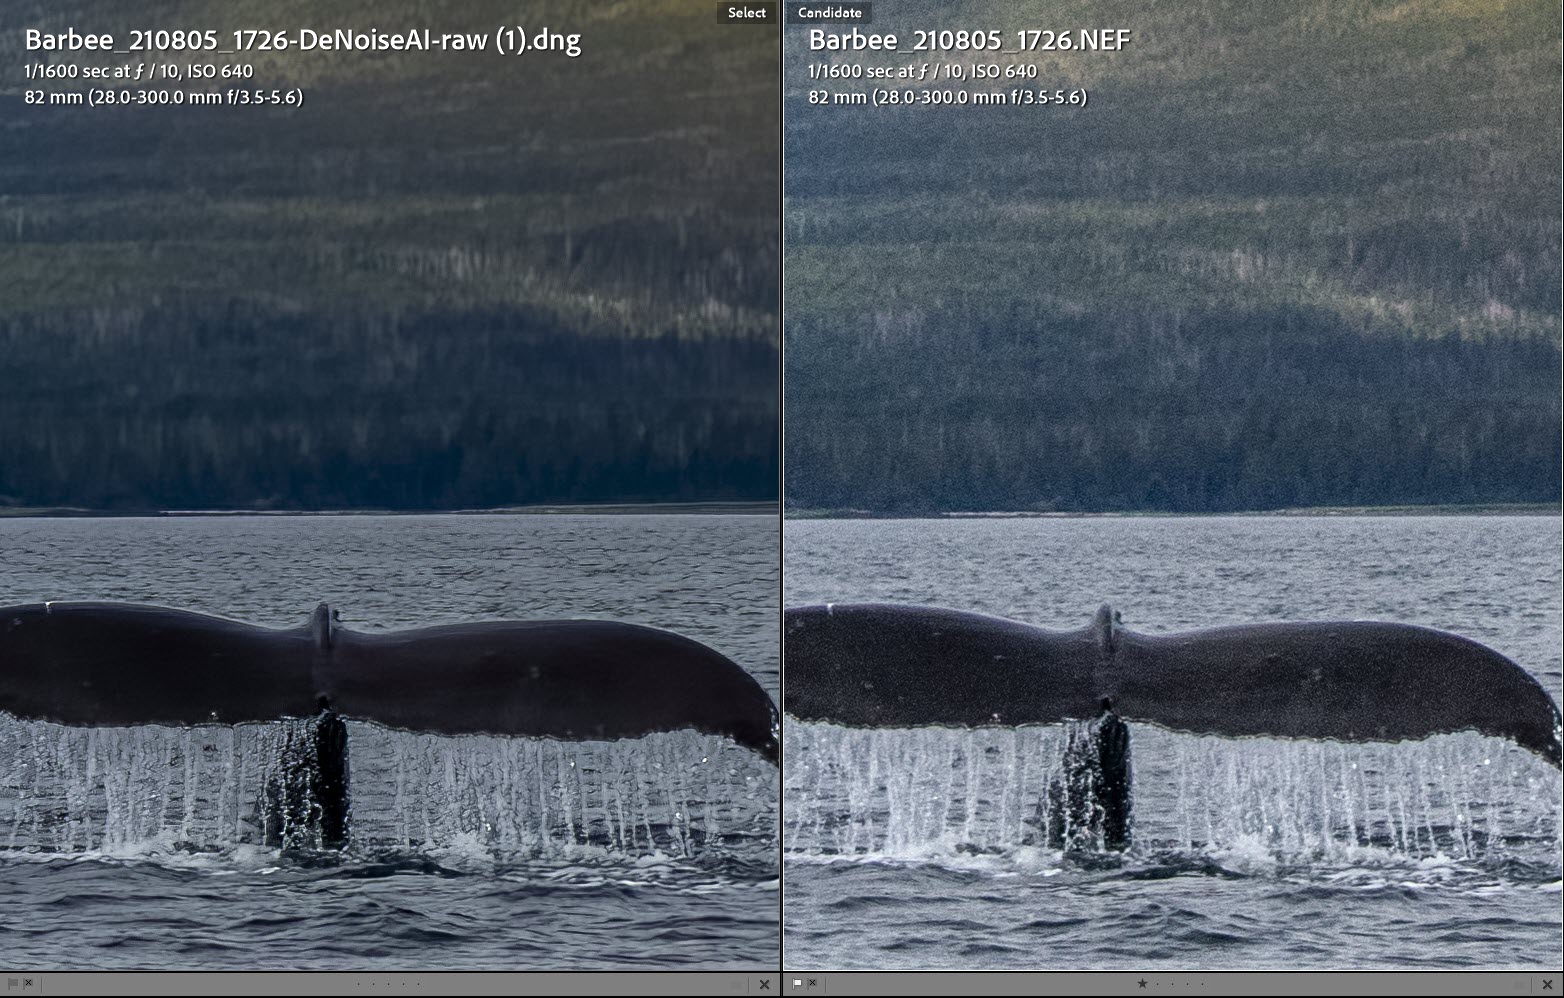
The new RAW model works from the original raw sensor data. It does a remarkable job. Not only does it do a great job on the noise, but it does an amazing job of clarifying and sharpening images at the same time. And it removes chromatic aberration. All using the raw sensor data from the camera. (And I thought I was thrilled with DeNoise AI before this new version.) You can then save the image as DNG if you wish to take the greatest advantage of the Lightroom Develop module or Camera Raw in Photoshop. See the comparison images below, in both images, the deNoise treated image is on the left (click on images to enlarge):
The downside, you may ask? The new RAW model does not yet work with all raw files (Fuji), nor does it work with DNG files. This means I cannot go back and use the new RAW model of DeNoise AI on my existing aurora and other night images. Sad. But not sad. DeNoise AI did an amazing job on those images already, so I’m not complaining.
But going forward, I’m going to want to change my workflow when it comes to converting to DNG files. While I still prefer using DNG for the reasons mentioned above, I want to be able to take advantage of the new RAW model in DeNoise AI. And who knows, they might even develop a RAW model for their other applications like GigaPixel AI and Sharpen AI.
Starting now, I’ll no longer convert images to DNG, at least not all of them.
The workflow for using the RAW model is different on a Mac than it is on a PC. On a Mac, one can simply drag the raw image thumbnail from Lightroom’s Grid view to the DeNoise AI app icon on the Mac.In Windows, it’s a little convoluted. See this article on the Topaz site for the two workflows.
Since the RAW model in DeNoise AI is using the raw sensor data, when the file is saved as a DNG file, it will look like the original raw file, even if you’ve edited the original raw file in Lightroom’s Develop module. Also, any metadata you may have added, like keywords and captions, will not come along for the ride. But all that is simple to fix by syncing the metadata and the develop settings from your original raw file to the newly saved dng file.
Once you do this, you’ll probably notice some slight color differences between your original developed raw image and the denoised dng file with the settings synced.
The color differences aren’t bad, just different. A little darker and more saturated perhaps. Below, the image on the right is the raw NEF file with Lightroom adjustments. The image on the left is the raw NEF file after RAW model noise reduction in DeNoise AI and then syncing the settings between the original and deNoised versions. You can see that the image on the left looks a bit darker.

There is a setting in DeNoise AI to “Apply RAW color correction.” I’ve been unable to detect a difference between images processed with and without this setting enabled.
If you have DeNoise AI, be sure to update to version 3.3 to get the new RAW model option. If you don’t yet own deNoise AI, you can click here and get it. Use the promo code FRIEND15 for a 15% discount (Affiliate link! If you buy, I get a small commission!)


Hey there, Rod. My name is Brian Matiash. I’m the Product Marketing Manager for Topaz Labs. I got a notification of your article because you linked to our Learning Center and I wanted to take a moment to thank you for the wonderful write-up on our new DeNoise AI RAW model! It makes me really happy to see that you’re enjoying it enough to make a change to your post-processing workflow. That’s big stuff!
In any case, I shared your article with the team because I think they’d enjoy reading it, too. Again, thanks for taking the time to share your thoughts on the new RAW model.
Thanks Brian,
I’m continually amazed at what DeNoise AI can do. One feature I didn’t mention in the article (mainly because it was about the RAW model) was the ease of comparing the different models. Because sometimes, especially in low noise images, the Clear model give the best results.
Thanks for such a great tool, it’s worth every penny!